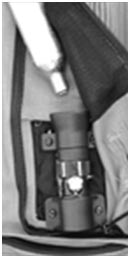
step 1
Unscrew the used gas cartridge and turn anti-clockwise.

step 2
To remove all residual air from the air cushion, spread the waistcoat out face down on a flat, smooth surface. Press against all the cushions with your hands until the gas has completely escaped. Do not fold or roll the waistcoat as this could cause damage.

step 3
Push the "adjustment bolt" (Allen screw supplied) into the hole at the bottom of the "insertion device" and fix it in place by hand.
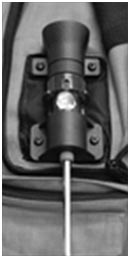
step 4
Then tighten it even further using the Allen key (included in the scope of delivery). Continue doing this slowly until the hole for the insertion socket with the ring (end of the spiral cable) in the aluminium cylinder can be placed in the middle of the hole in the insertion device.
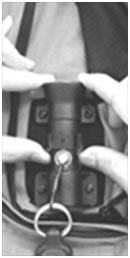
step 5
Insert the "insertion nozzle" deep into the hole of the insertion device. Use your fingernails to press the insertion socket completely into the hole. If it does not fit, use the Allen key to adjust the position of the insertion device.
step 6
Pull the spiral cable down and then slide the red sliding cover down over the hole. If it is blocked by the ring and cannot be pushed down, adjust it until it fits over the hole.
step 7
Once the red sliding cover has been pushed all the way down, loosen and remove the adjustment bolt. ATTENTION: The adjustment bolt must always be removed, otherwise the waistcoat cannot be activated.

step 8
Push the red sliding cover all the way up again to continue using the waistcoat.

step 9
Screw a new gas cartridge straight and tightly into the base until you can no longer turn it any further. Please ensure that the cartridge is screwed in straight.